Working together
Last updated on 2025-12-16 | Edit this page
Overview
Questions
- How to best work on the same code?
Objectives
- Add contributors
- Understand roles
- Use of branches.
Let’s start collaborating!
Now we come to the collaborative work.
In general, there are two approaches:
In the fork and pull model, anyone can fork an existing repository and push changes to their personal fork. You do not need permission to the source repository to push to a user-owned fork. The changes can be pulled into the source repository by the project maintainer. When you open a pull request proposing changes from your user-owned fork to a branch in the source (upstream) repository, you can allow anyone with push access to the upstream repository to make changes to your pull request. This model is popular with open source projects as it reduces the amount of friction for new contributors and allows people to work independently without upfront coordination.
In the shared repository model, collaborators are granted push access to a single shared repository and topic branches are created when changes need to be made. Pull requests are useful in this model as they initiate code review and general discussion about a set of changes before the changes are merged into the main development branch. This model is more prevalent with small teams and organizations collaborating on private projects.
We will be using automated workflows, some of which require authentication features stored as “secrets” in the repository, and they will not be available in forks. Therefore, we choose working on a shared repository where all contributors are added as members.
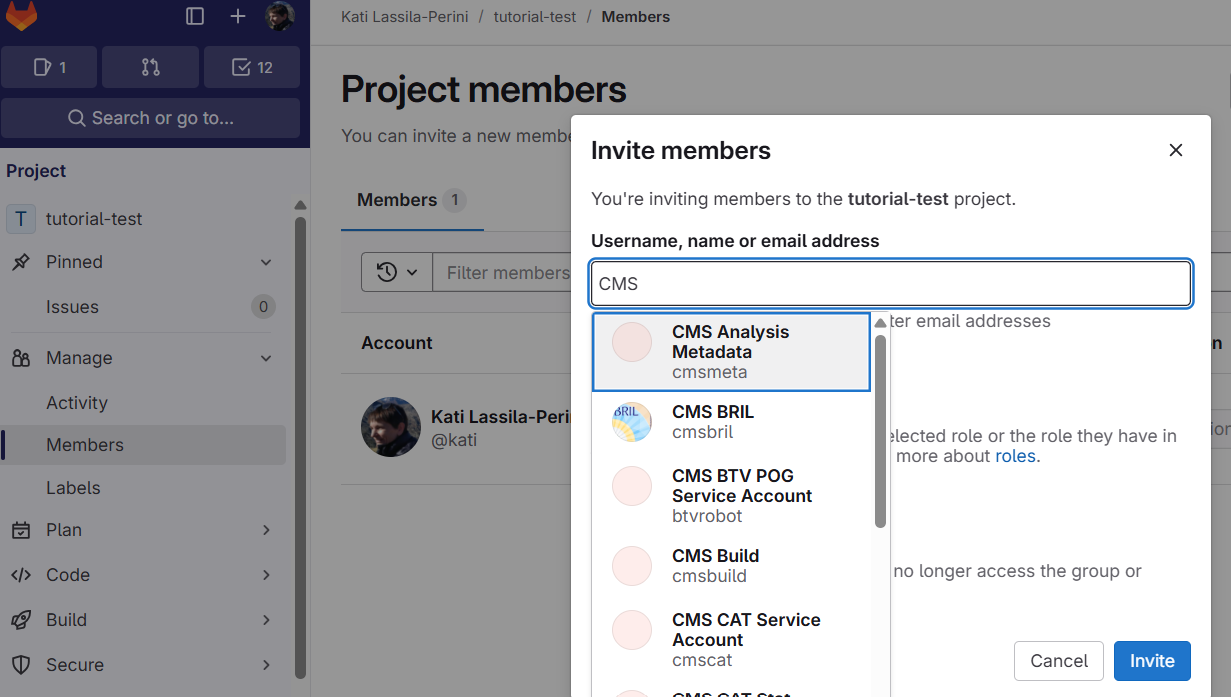
In the shared repository, go to Manage -> Members.
In the CERN GitLab instance, you can find all CERN accounts, including service accounts:
Learn about the roles.
Note in particular the branch rules and protected branches, see them in Settings -> Repository.
Only owners or maintainers can push directly to the default branch.
You will see a message similar to this:
remote: GitLab: You are not allowed to push code to protected branches on this project.
To gitlab.com:<project address>
! [remote rejected] HEAD -> main (pre-receive hook declined)
error: failed to push some refs to 'gitlab.com:<project address>'Make the changes with the usual Git workflow. Note that if you have a local repository with the same name, you will need to define another local name to the newly cloned local area:
git clone <git address> <local-repo-name>
cd <local-repo-name>
Create a new branch:
git checkout -b new-featureDo the edits and then
git add .
git commit -m "Describe your updates"
git push origin new-feature
Follow the link to make a merge request and the repository owner can review and merge it.

Browse through the tabs and see the changes. Do not merge it yet as we continue to the next exercise to test it locally.
Exercise 04.3 - checking a new feature branch locally
As the project owner or maintainer, test the new feature locally. You would do this, for example, to run some code locally to see if it works as expected.
Use git fetch origin to get the latest changes and then
checkout the new branch.
Once tested, merge the request on the GitLab Web UI and delete your local branch.
Retreive the status of the remote repository so that you know the new branch name.
$ git fetch origin
remote: Enumerating objects: 12, done.
remote: Counting objects: 100% (12/12), done.
remote: Compressing objects: 100% (8/8), done.
remote: Total 11 (delta 3), reused 0 (delta 0), pack-reused 0 (from 0)
Unpacking objects: 100% (11/11), 1.67 KiB | 25.00 KiB/s, done.
From gitlab.com:<project address>
   395b0d5..6372999  main       -> origin/main
 * [new branch]      file4      -> origin/file4
Checkout the branch with
git checkout -b file4 origin/file4To test, you might run some code locally. If it looks OK, merge the
merge request on the GitLab Web UI. You can delete this local branch
after testing. You may need option -D to force it.
Remember to update your local main/master branch!!!
After a merge request have been merged, remember to update your local default branch.
git checkout main
git pull
Do this every time when you start a new development.
You can also delete your previous branch:
git branch -d new-feature- If the use of automated workflows is planned, it is convenient to work in a shared repository instead of using forks.
- You will use branches to contribute to the shared repository (unless you are the owner or the maintainer).