Introduction
Overview
Teaching: 10 min
Exercises: 0 minQuestions
What is the CAP?
Objectives
Understand what is the CERN Analysis Preservation portal (CAP).
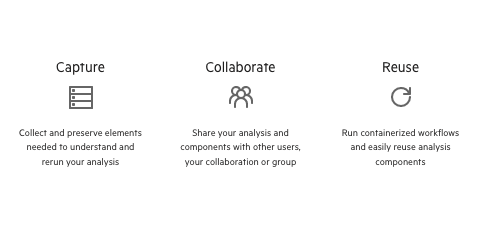
The CERN analysis preservation effort pursuits the goal to describe and structure the knowledge behing the physics analyses aiming for its future reuse.
- Describe all assets of an analysis
- Track information provenance
- Ensure sufficient documentation
- Capture associated links
All of this information is clear when the physicists are doing their analysis, at the time of the data taking. But, short after, much of the information is forgotten and difficult to retrieve. To avoid this, it is neccesary to store and safely preserve the information about the analysis input data and triggers, the analysis code and its dependencies, the runtime computational environment and the analysis workflow steps in a trusted digital repository.
For achieving this, the need arose to create a user friendly web portal that will serve as a common place to preserve and search the information. This is where the CERN analysis preservation portal comes into play!
The CERN analysis preservation portal (CAP) comprises a set of tools and services aiming to assist researchers in describing and preserving all the components of a physics analysis such as data, software and computing environment. Together with the associated documentation, all these assets are kept in one place so that the analysis can be fully or partially reused even several years after the publication of the original scientific results. The CMS part of the portal, integrates with the CMS internal analysis registry (CADI) to capture all analyses basic information, complemented with a detailed submission form for full information. The CMS data aggregation system (DAS), containing the datasets used for the analyses, is interfaced to the deposit form to assist in filling in exact dataset names used in the analysis to ensure searchability.
The CAP portal effort is run by CERN Scientific Information Services with the help from the different experiments. The portal is still in beta phase, but already providing many useful functionalities. In this tutorial we will get you through some of them, explaining how you can start benefiting from portal even today.
Let’s give it a try!
Key Points
The CAP portal goal is to help researchers preserve their analyses.
Create a new CAP entry
Overview
Teaching: 5 min
Exercises: 5 minQuestions
Who can preserve the analysis code in CAP?
Objectives
Understand the overall structure of the CAP
Create a new CAP entry for our own personal project
Overall view
After the introduction showing the general aspects of the CAP portal, it’s now time to check on your own how it all works!
First, follow the link and log in portal with your CERN account.
The first page you can see is your dashboard. It gives you a quick overlook on the latest work from you and other members of collaboration. Right now, there’s not much going on (as you haven’t started preserving your work yet), but we will change it very soon! For now, you can check analysis preserved by other members of your collaboration.
Switch from MINE to ALL tab in PUBLISHED IN COLLABORATION view. You can click on analysis to find out more details.
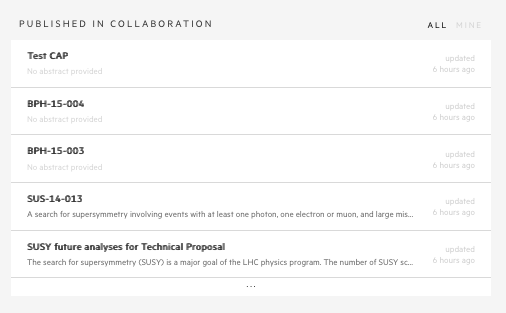
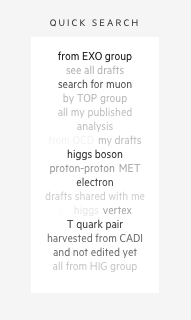
Another section of the dashboard is a QUICK SEARCH. It’s a word map with some of the most common search phrases, that will take you to your search results with just one click. For example, if you click on EXO you will see the list with all the CAP entries in the EXOTICA group, that have been already preserved. Try!
Start preserving
Let’s now preserve your own analysis!
When inside of the CAP portal you can go directly to CREATE.
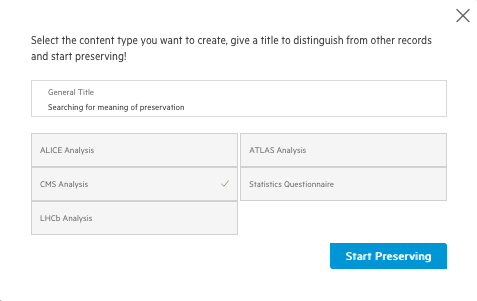
A prompt will appear asking you about the title for the analysis to be preserved and the type of content you want to preserve. On the latter you should select CMS Analysis. For a title pick something that will help you to easily find your analysis among the others, e.g Search for H -> WW -> 2l 2nu. And Start Preserving!
Basic information
Congratulations, you just made a first step!
You can see that form consists a lot of sections, where you can provide some extra information about your analysis. Any piece of information is extremely useful - it will make your analysis easily searchable and reproducible in the future.
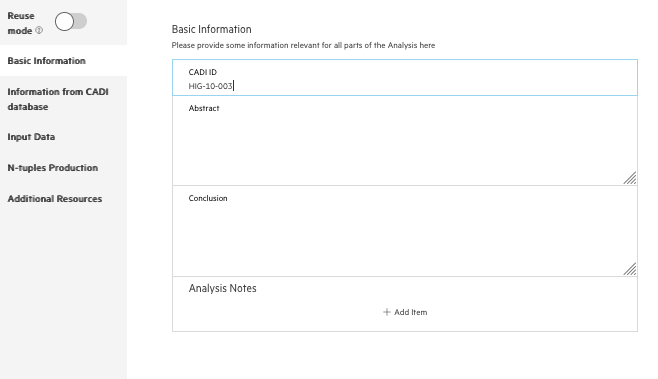
The first section is a Basic Information. If your analysis has already assigned CADI ID, we can fetch some information for you. Try to put an example CADI_ID, like HIG-10-003.
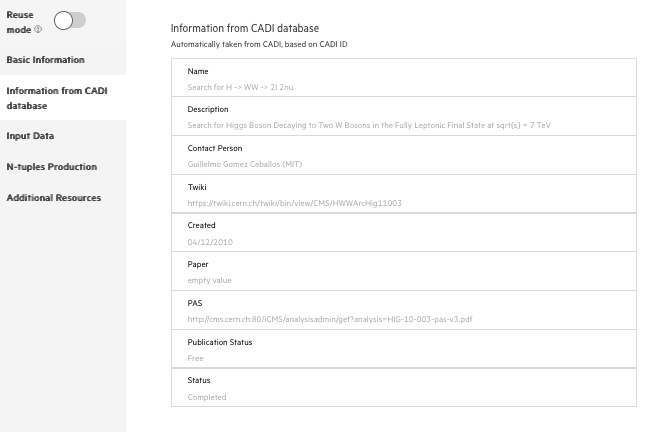
Now check an Information from CADI database section. This information will be saved with your analysis, so you can search data from two systems in one place. That easy!
Key Points
A new CAP entry can be easily created to help us preserve our analysis assets
CAP entries associated to CADI analyses are automatically filled with the CADI information
Adding a dataset to the CAP entry
Overview
Teaching: 5 min
Exercises: 10 minQuestions
How to preserve the dataset information?
Objectives
See how to include datasets to the CAP entry
Learn how to search for your datasets using integration with DAS database
Export the dataset information as a latex table
Including a dataset to the CAP entry
One of the first things someone accessing your preserved analysis will want to know, is which dataset you used when perfoming your analysis. Let’s check, how we can provide this information!
First, from the navigation menu on the left side, pick Input Data section. You can see that there are three different types of datasets that you can provide. All of those are integrated with Data Aggregation System (DAS) in order to provide a quick search and validation functionality. Let’s try to add some.
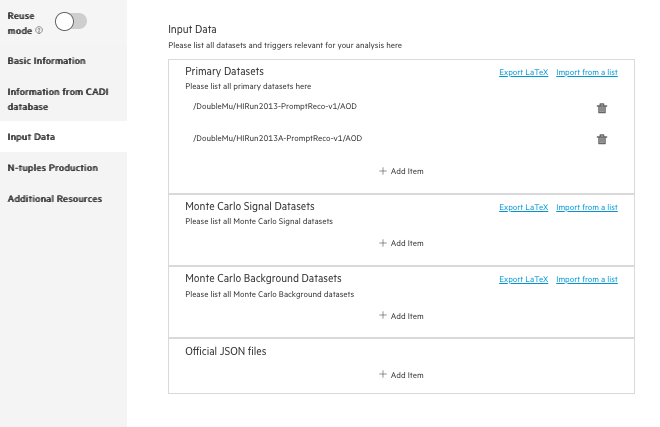
- Pick
Primary Datasetsfor real data dataset.Add Item- Start typing in
pathfield to check autosuggestions/SingleMu/Run2012A - Try quick search in
pathfield/Commissioning/Run2010*/* - Pick
/Commissioning/Run2010B-Apr21ReReco-v1/AOD - Now add a trigger for your dataset (
Triggers +). Triggers will be validated against your dataset path and year. Start typing intriggerfield to check autosuggestionsHLT
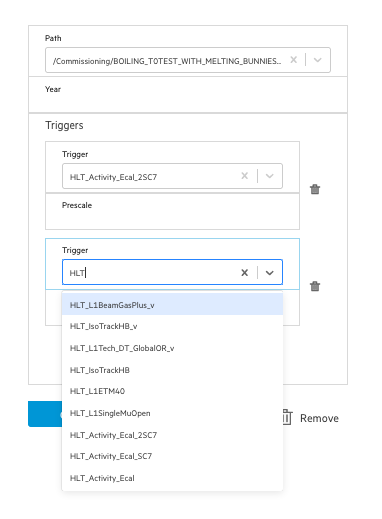
-
Pick
Monte Carlo Signal Datasetsto include some dataset simulation on the signal model your are using in your analysis. Start typing to check quick search/autocompletion features. -
Pick
Monte Carlo Background Dataststo include some dataset simulation on the background you are using in your analysis. Start typing to check quick search/autocompletion features.
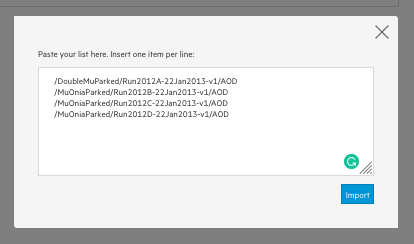
Importing datasets from a clipboard
In case you already have a full list of used datasets, you can simply copy-paste them in the form. Just click on import from clipobard, that can be found on header of each datasets section.
Exporting the datasets as a Latex file
Now that you have your dataset paths stored, you may need to export them to include them in a paper or just to share it with some collaborators. For doing so, the CAP system has a Latex exporter that will generate an exportable LaTeX dataset table. Simply click on export to Latex that can be found on header of each datasets section.
Key Points
Datasets can be easily found and included in your CAP entry thanks to the dataset name suggestion system
The dataset names are checked against the Data Aggregation System (DAS)
Uploading your files
Overview
Teaching: 5 min
Exercises: 5 minQuestions
How can I upload files to my analysis?
Objectives
Learn how to upload file from your disk
Uploading files
CAP encourages you to store all important pieces of information, that are valuable for your analysis. Those can be instructions, plots, tables, documentations, presentations - basically everything that you find useful for your work. To make this happen, each analysis has its File Manager . In the editor view, you can see it on the right side of the screen.
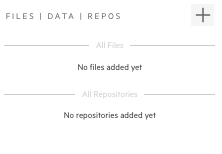
There are two sections here, one for files and one for repositories. Let’s leave the repositories one for next chapter and now focus on files. All the files uploaded from the File Manager will be saved in your analysis space. Think about them as part of one capsule - whatever you decide to do with your analysis - share, delete, publish - will happen to your files as well!
Let’s see how it works. First let’s upload some file from our local disk.
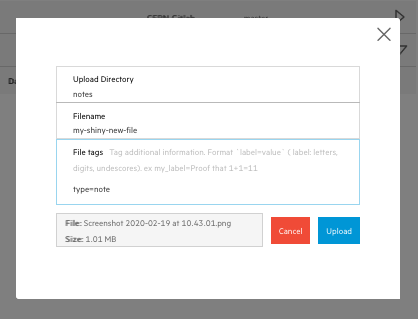
- Click
+button in your file manager - Drag and drop (or click browse and pick) file from your disk
- Give your file a new name, like
my-shiny-new-file, and place it in a new directorynotes - Let’s give it a
type=notetag - Click upload
- Done!
You can upload more files or just close the popup for now. Check if you can see your file saved in your analysis.

Try to download your file.
- Go to the
File Manager - When you hover on your filename you can see a small arrow appearing on the right side - click on it
- Pick
Downloadfrom the dropdown menu - Open or save your file
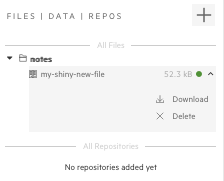
Try to follow similar steps and delete your file (simply pick a Delete option from a dropdown).
Key Points
Your files can be easily uploaded and preserved together with the other analysis assets
Connecting with your repositories
Overview
Teaching: 10 min
Exercises: 10 minQuestions
Which are the repositories that can be connected with CAP?
Objectives
Learn how to connect a repository with your analysis
How to connect your Github/Gitlab account with CAP
Connecting CAP with Git repositories
We have already created a new CAP entry, added some metadata (datasets, triggers information) and uploaded files. Now it’s time to tell us, where is the code that you used in your analysis.
It is possible to connect an external account (Github, CERN Gitlab, ORCiD, Zenodo. . . ) with the CAP account, to automate tasks and content submission. One can just add the current repository content from the tarball or create a connection (webhook) so that everytime something is changed, the CAP is automatically updated. Let’s try it out using your CERN Gitlab account!
In general, if you want to connect a public repository, you don’t need to connect your account. CERN Gitlab is an exception, as even public repositories require a CERN authentication. So let’s first connect your account.
- Open CAP in a new tab
-
Click on your account icon and go to
Settings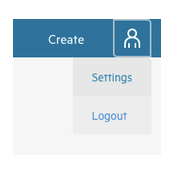
-
Choose
+ CONNECTnext toGITLAB CERNand connect your account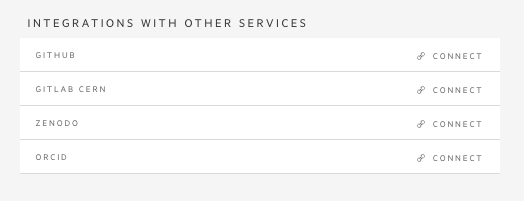
Now let’s go back to your open analysis in the previous tab:
- Go to the menu on your left and click on the connection symbol (third icon)
- Right now you should see no repositories connected with your analysis
- To change it you can use repository created specially for this workshop or one of your own Gitlab repositories
https://gitlab.cern.ch/awesome-workshop/payload-cap-cms -
We have two options:
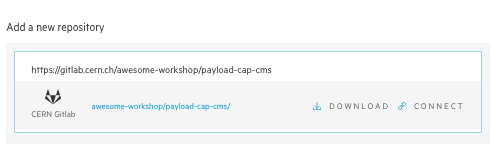
- download - like downloading a file - it will make a snapshot of a repo at this moment and attach it to your analysis files (you will find it with other files in your
File Manager). Use this option for repositories that you use, but not maintain or when your analysis code is already in its final state. - connect - create a link between your repository and analysis. This way you can keep your analysis up to date with your code changes - we will make a snapshot of each new version of your code and attach it to your analysis for you. It’s recommended for analysis that are still in progress.
- download - like downloading a file - it will make a snapshot of a repo at this moment and attach it to your analysis files (you will find it with other files in your
- Let’s pick
CONNECT. - Connecting a repository is an asynchronous task, hence it requires you to refresh your page (we’re sorry, this is still BETA, we’ll make it much better soon!)
-
Check if you can see connected repo in your
Connected Repositorieslist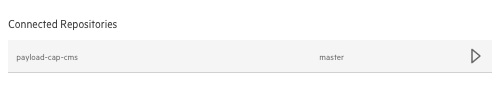
-
Go to your
File Managerand download the snapshot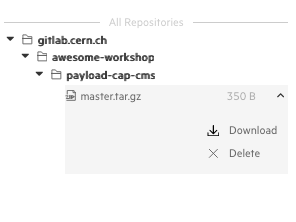
- Now you can try to push some changes in the repo (or if you picked our workshop repository wait for teacher to make a new commit)
- Refresh your page
-
In
Connected Repositoriesfind your repo and click on an arrow on the right side - you can see a new snapshot there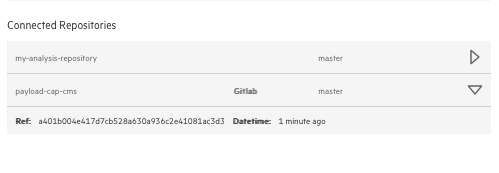
- Go to
File Managerand download your updated repository. Can you see new changes?
Key Points
Github and Gitlab repositories can be connected with CAP so that code/metadata updates are automatically propagated to the CAP system
CAP provides a way to connect with both, public and private repositories
Sharing your analysis
Overview
Teaching: 10 min
Exercises: 10 minQuestions
Who can see my analysis
How can I give access to my work to others
Objectives
Learn how to share your work with others
Share your work
CAP has two basic type of entries - drafts and published. What’s the difference?
Once you start your analysis in CAP, you first create a draft. You’re its owner and the only person that can access it (unless you decide otherwise).
Drafts are meant to be used to preserve a work-in-progress analysis, that are not ready to be shared with others yet. Although, if you’re collaborating with
somebody, or need to show it to your supervisor, reviewer, you can give them read/write/admin access to your draft. You work on your draft, keep editing, adding files,
repositories, or even delete it, and start from scratch. But once your analysis is ready, we encourage you to click publish button. What does publish in CAP mean?
Publishing is the way, to preserve your work within CAP (and CAP only!). When you click publish button, few things will happen.
- We’ll create a new entry for your analysis, with a current snapshot of everything that it contains - metadata, files, repositories - everything preserved!
- All the members of your collaboration will be able to see it
- It will get a Persistent Identifier (PID) with a version number, so can be referenced and used in other analysis
- You wont be able to delete it - although you can edit and re-publish at any time - which will make a new version of published entry
During this course we’re working on the dev instance, so we can publish our test analysis, but think twice before doing this in production server;)
Let’s try to give a read access to your CAP analysis to all the cms-members
- Go to the menu on your left and click on the share symbol (last icon)
- You can see yourself marked as on owner of this analysis, with all the access (makes sense)
- Pick
Egroup emailand type cms egroup mail
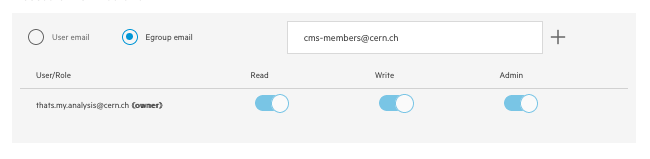
- Click
+button - Now all the cms-members have read access to your analysis! (You can check in your dashboard if you can see some new drafts from your colleagues)
- Revoke access by pressing on
readswitch next to the egroup name
Now let’s check how to publish your analysis
- From the same
share with otherstab clickPublishbutton
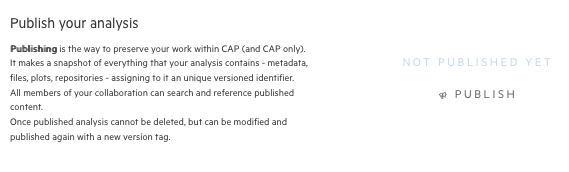
- Confirm and congrats - your work has been published in CAP!
- Go to the home page and check what has changed in your dashboard
- did numbers on your analysis chart changed?
- can you find your analysis in
published in collaborationlist? - can you see analysis of your colleagues?
Key Points
CAP has two types of entries - drafts and published
Draft can be shared by author with other people
Published is a versioned snapshot of your work, that becomes visible to all the members of collaboration
Once published analysis cannot be deleted - but allows changes and republish with a new version number
How to search
Overview
Teaching: 5 min
Exercises: 10 minQuestions
How can I find analysis using specific datasets, triggers
How can I find analysis with this CADI ID
Objectives
Learn how to search in CAP
Find your analysis
So we ask users to provide us with all this information, but how can we find it later?
At the top of the page you can see a searchbar. As you start typing, you’ll see two options in the dropdown:

You already know the difference between those two, so just so you know, the default search (when you don’t click any option) is a search in published.
First, let’s try to search in drafts to find your analysis
- Type in a searchbar title of your analysis and pick
search in draftsin the dropdown - Find your analysis in the search results
Now let’s try to search some published analysis:
- Type in a searchbar and pick
search in publisheddataset:/DoubleMu*/* - Use filters on the left side to filter by your working group (try few of them and see how results are changing)
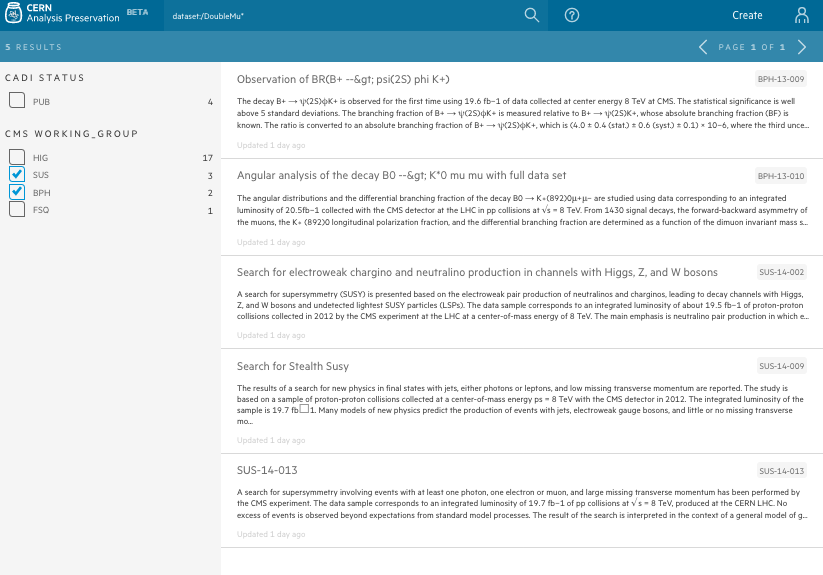
- Now try to search for an analysis with a specific CADI ID. Type in a searchbar
BTV-13-001 - Or to find all analysis from this year in this working group
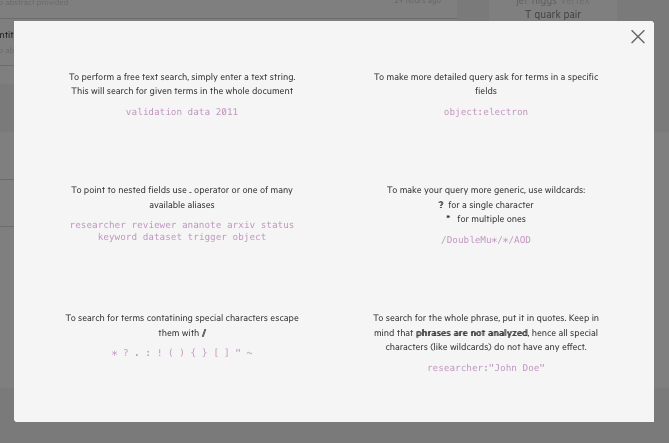
BTV-13-* - Try your own queries! Click on the
?next to the searchbar to find out more about search queries
Key Points
CAP entries can be searched (among many other options) by triggers, datasets, working groups, CADI ID, etc.